
Lab: Interactive Navigation and Gestures
Estimated time: 20 minutes
What you will learn
In this lab, you will learn to design a bottom navigation bar in Figma for a mobile app layout. You'll create two mobile screens representing different app sections, such as Home and Book Detail. Using Figma's Prototype feature, you'll connect these screens with navigation links. You'll also add a swipe gesture to allow users to slide between the screens smoothly. This interaction helps simulate a more realistic user experience for app testing and presentation.
Learning objectives
By the end of this lab, you will be able to:
- Design a simple mobile navigation layout
- Create a working bottom navigation link
- Add a basic swipe gesture between screens
- Test the prototype with Figma's play button
Prerequisites
- Basic understanding of Figma (drawing shapes, using text, aligning elements)
Note: If this is your first time using Figma, we recommend creating an account. To do this, right-click Getting Started with Figma and open it in a new tab to sign up.
Introduction
Navigation and gestures are two key parts of mobile user experience. In this lab, you will create two screens of a mobile bookstore app. One will be the Home screen, and the second will be the Book Details screen. Users will use a tap on the navigation bar and a swipe gesture to go from Home to Details and vice versa.
Scenario
Design brief
You are designing an app called "PageFlip", a bookstore app. You want users to:
- Tap the Search icon to go to the Book Detail page
- Swipe left on icon from the Book Detail screen to go to the Home page
Part 1: Getting started
Step 1: Set-up Artboards - Open Figma and create a new design file.
Use the Frame Tool (F) and select Phone → iPhone 13 size.

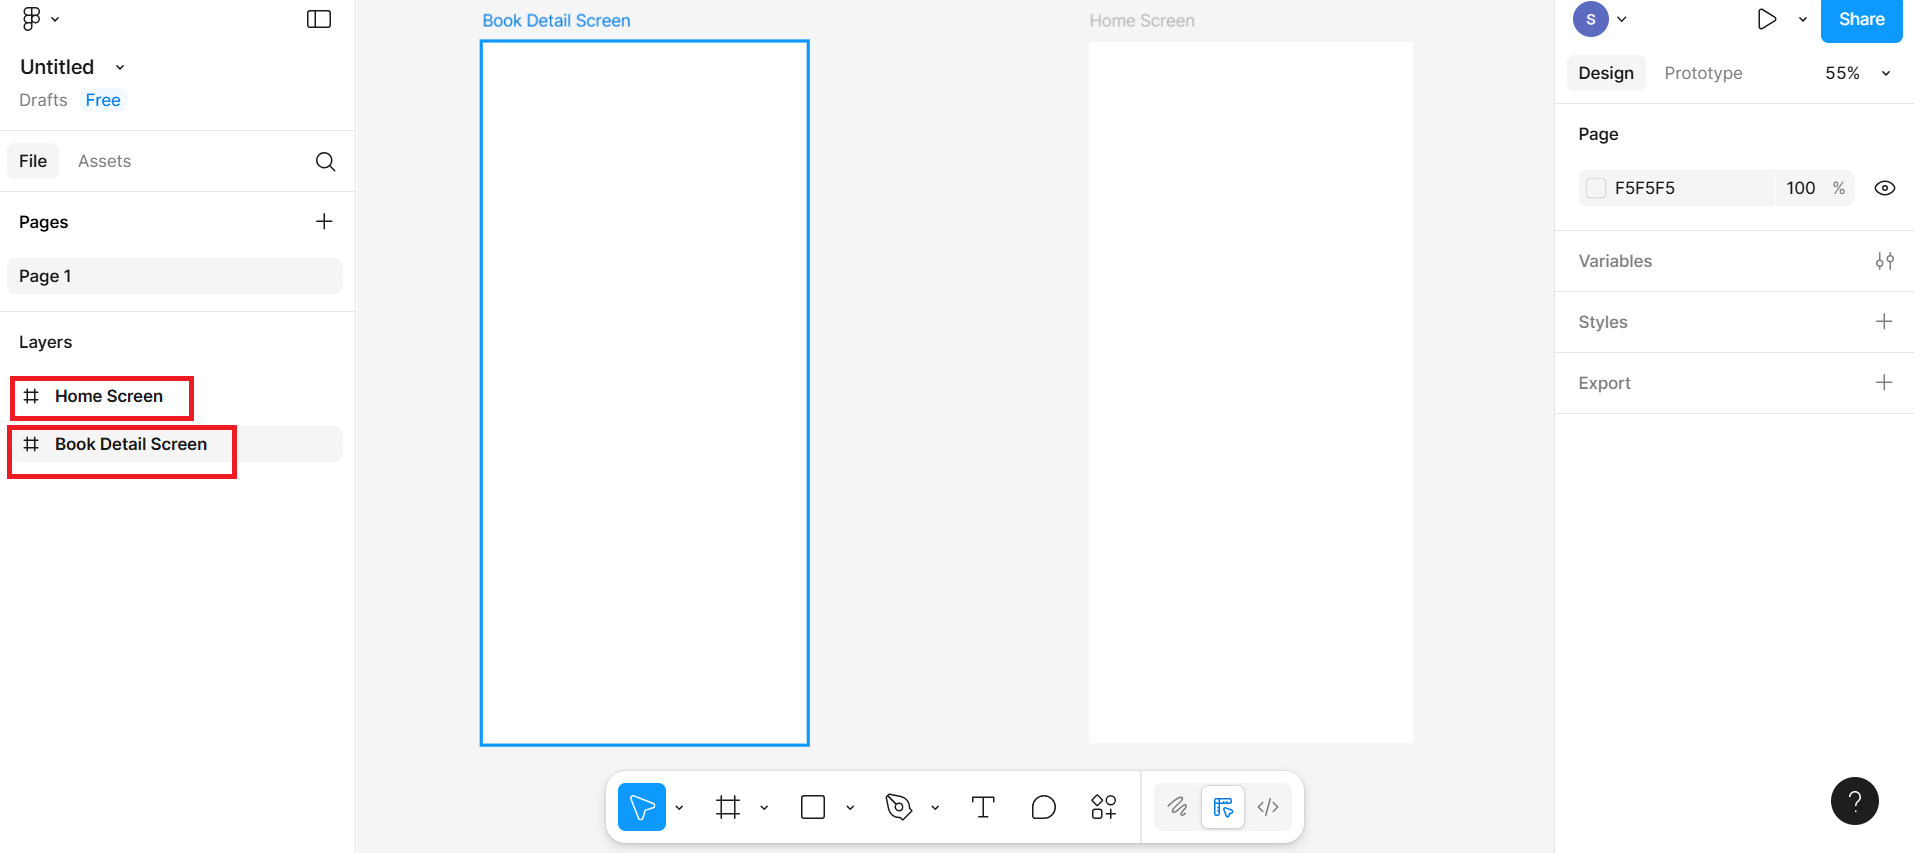
Create 2 frames side-by-side and rename the frames in the layers panel:
Frame 1: Home Screen
Frame 2: Book Detail Screen
Step 2: Design home screen
Add a title at the top with the help of T from the bottom menu bar: "Welcome to PageFlip"
Below that, add a rectangle and then add text for a "featured book".
At the bottom, draw a bottom bar using a rectangle or line.
Add 2 icons (install use Figma plugin "Material Icons" or use any already installed plugin):
Choose icons from the plugin
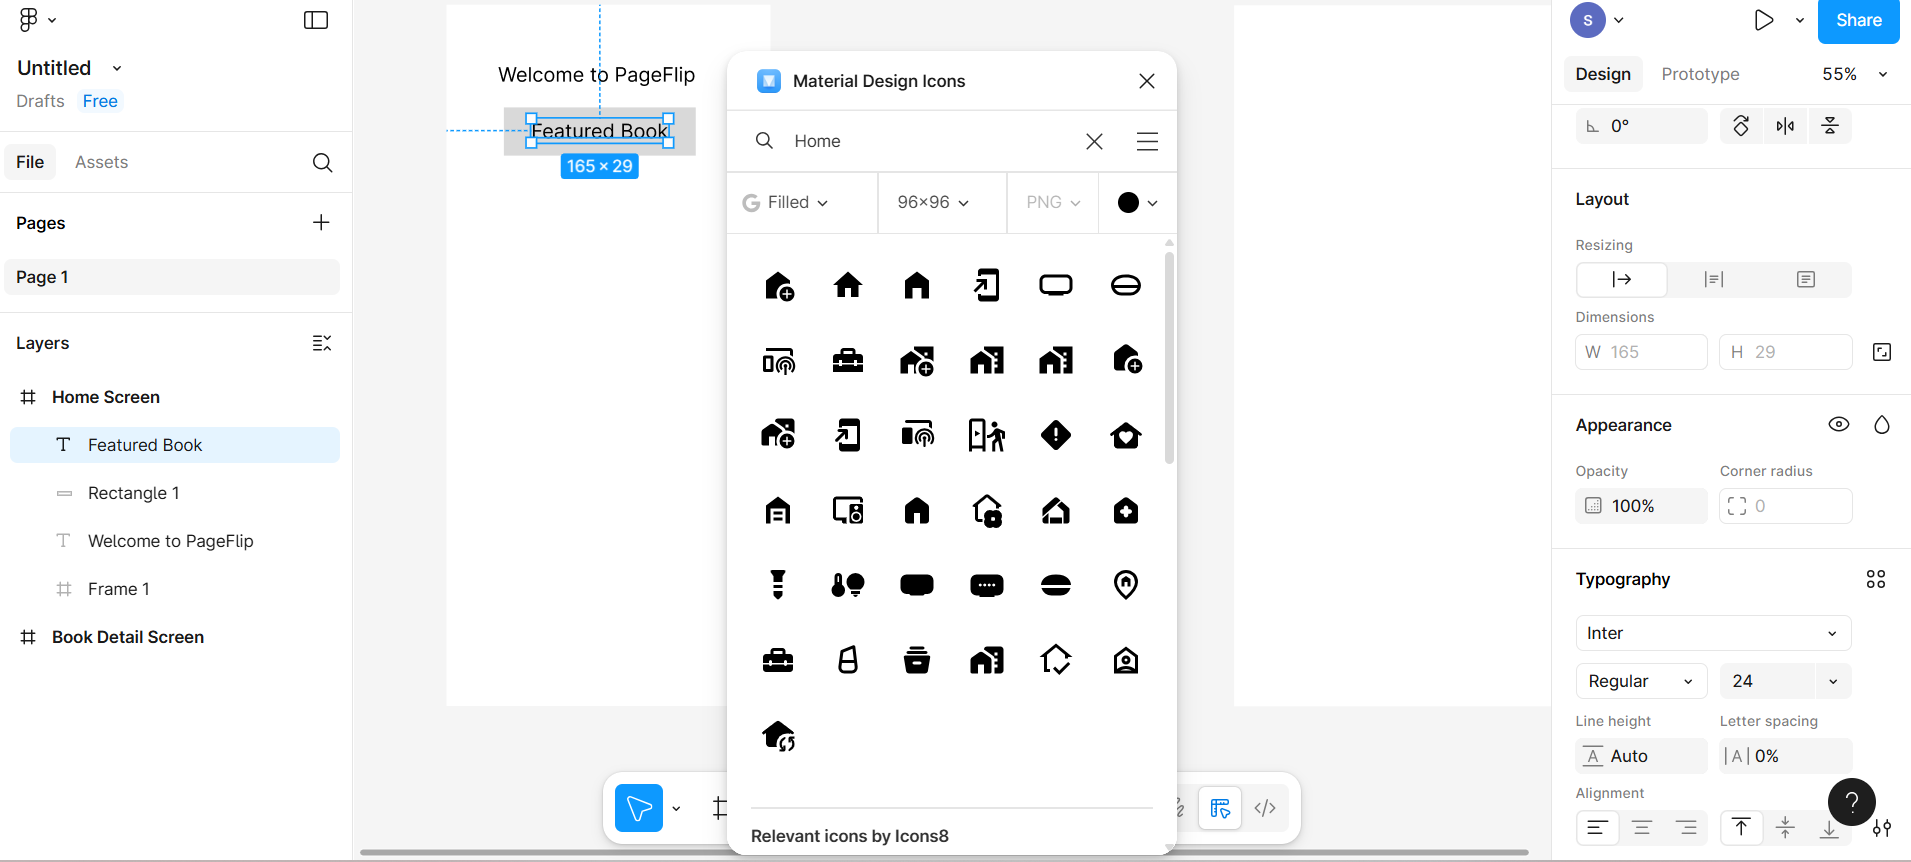
- Search for Home icon and click on any icon you want to include. Then drag that icon to its correct position.
- Search for Search icon and click on any icon you want to include. Then drag that icon to its correct position.
Add text labels under each icon.
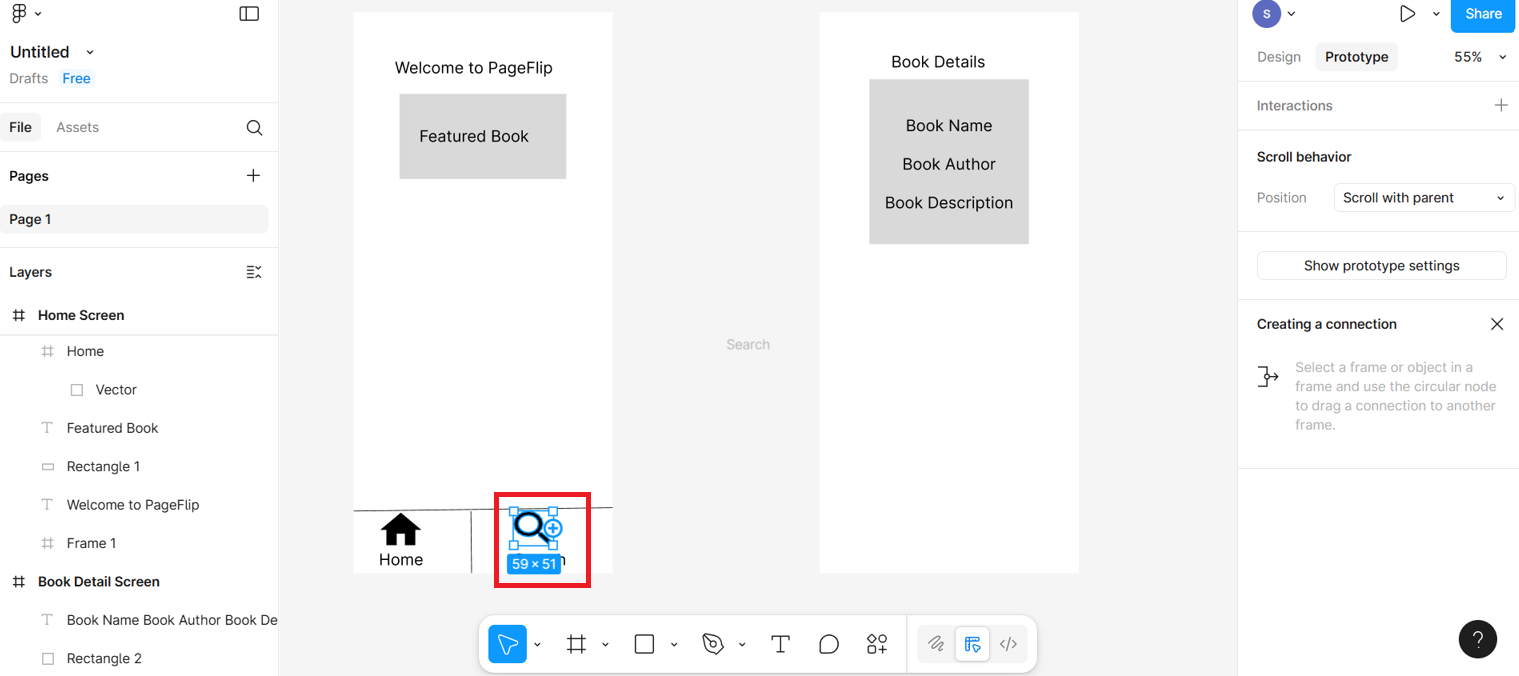
The entire artboard should resemble the provided screenshot.
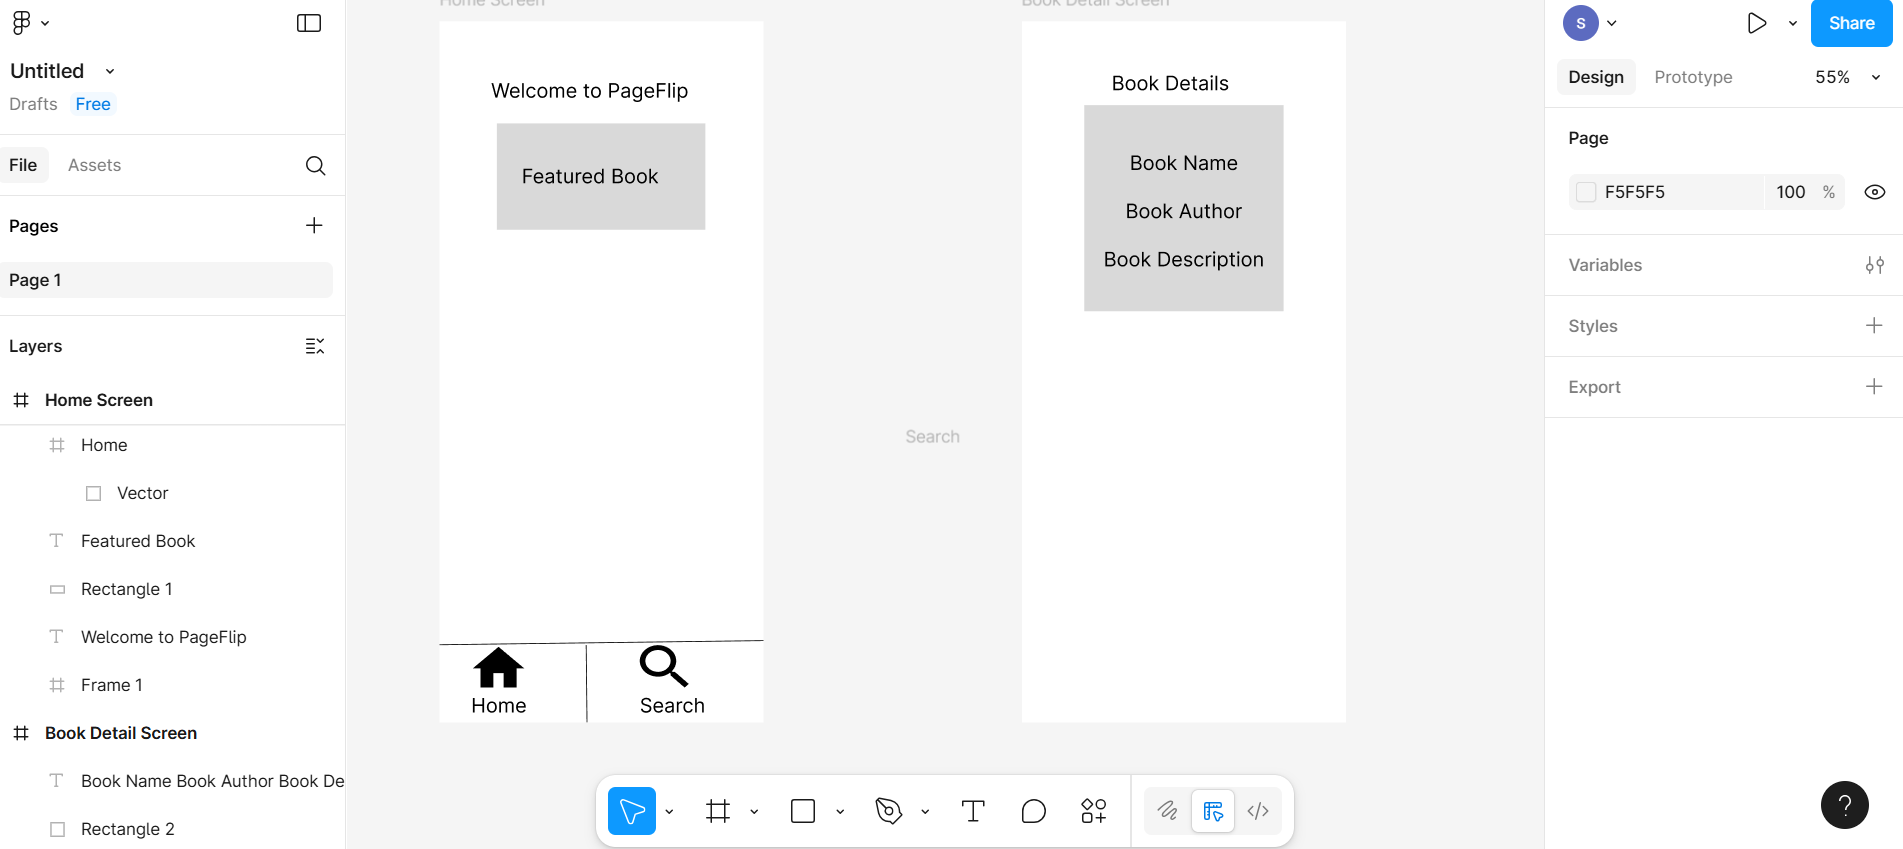
Step 3: Design book detail screen
Now using T for text from bottom menu bar add a title: "Book Details".
Create rectangle and then add text for the Book Name, Book Author, and Book Description
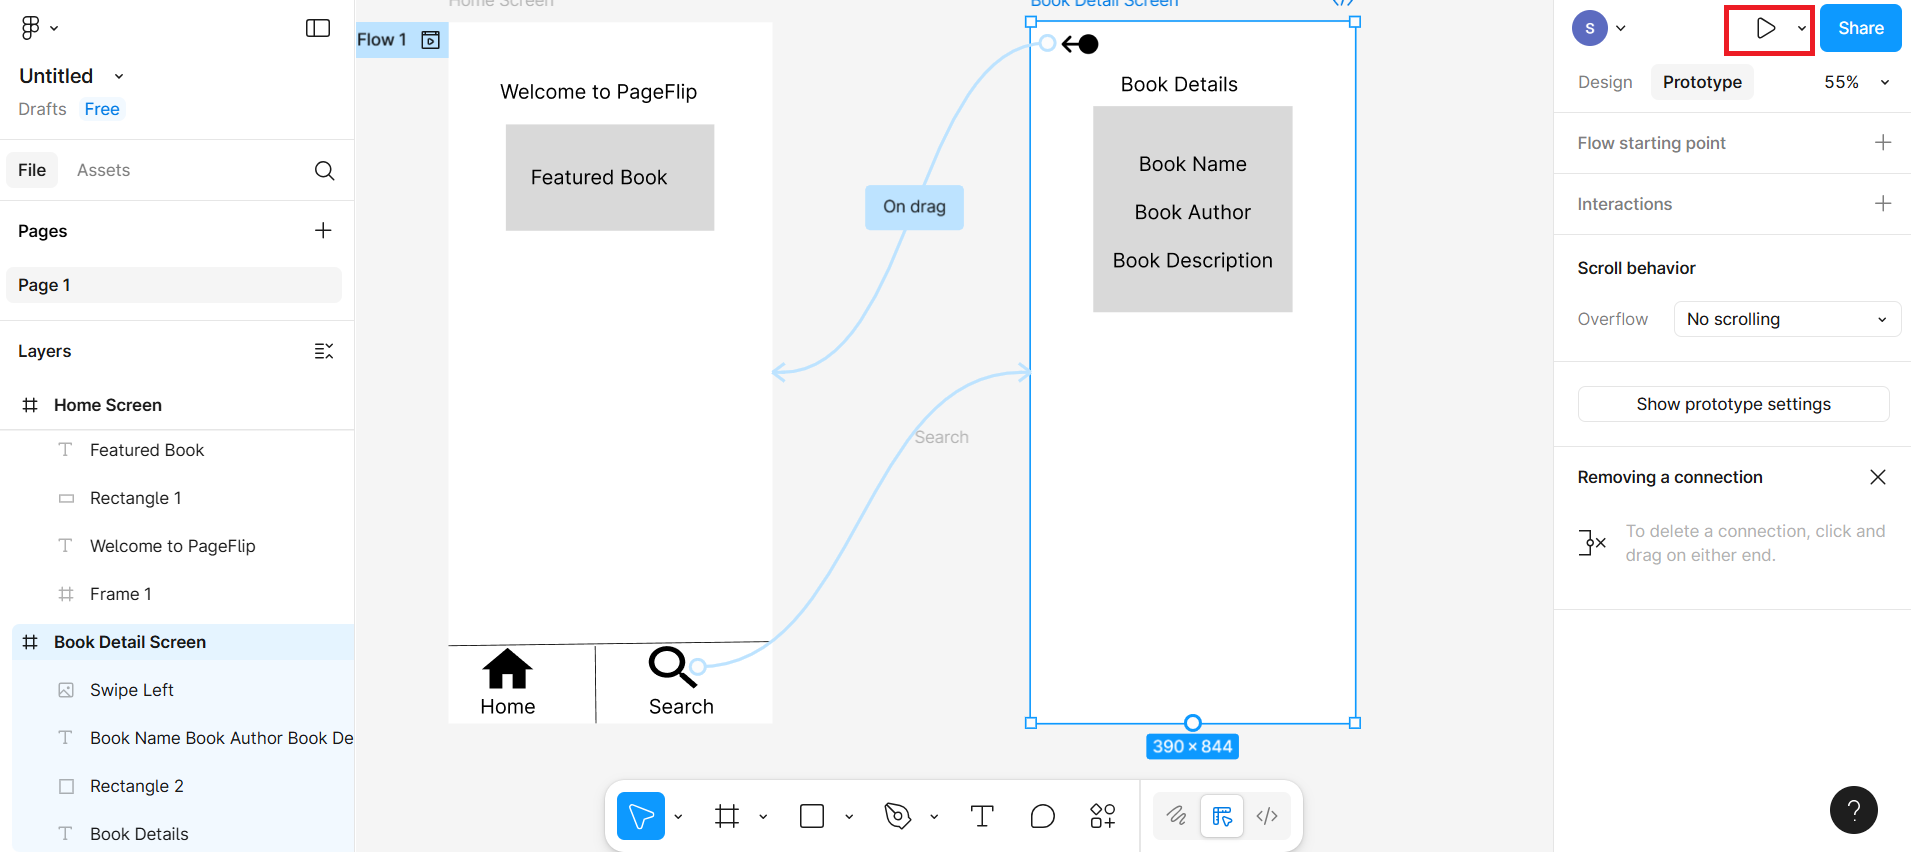
Step 4: Add tap interaction (navigation)
Go to the Prototype tab in the right panel
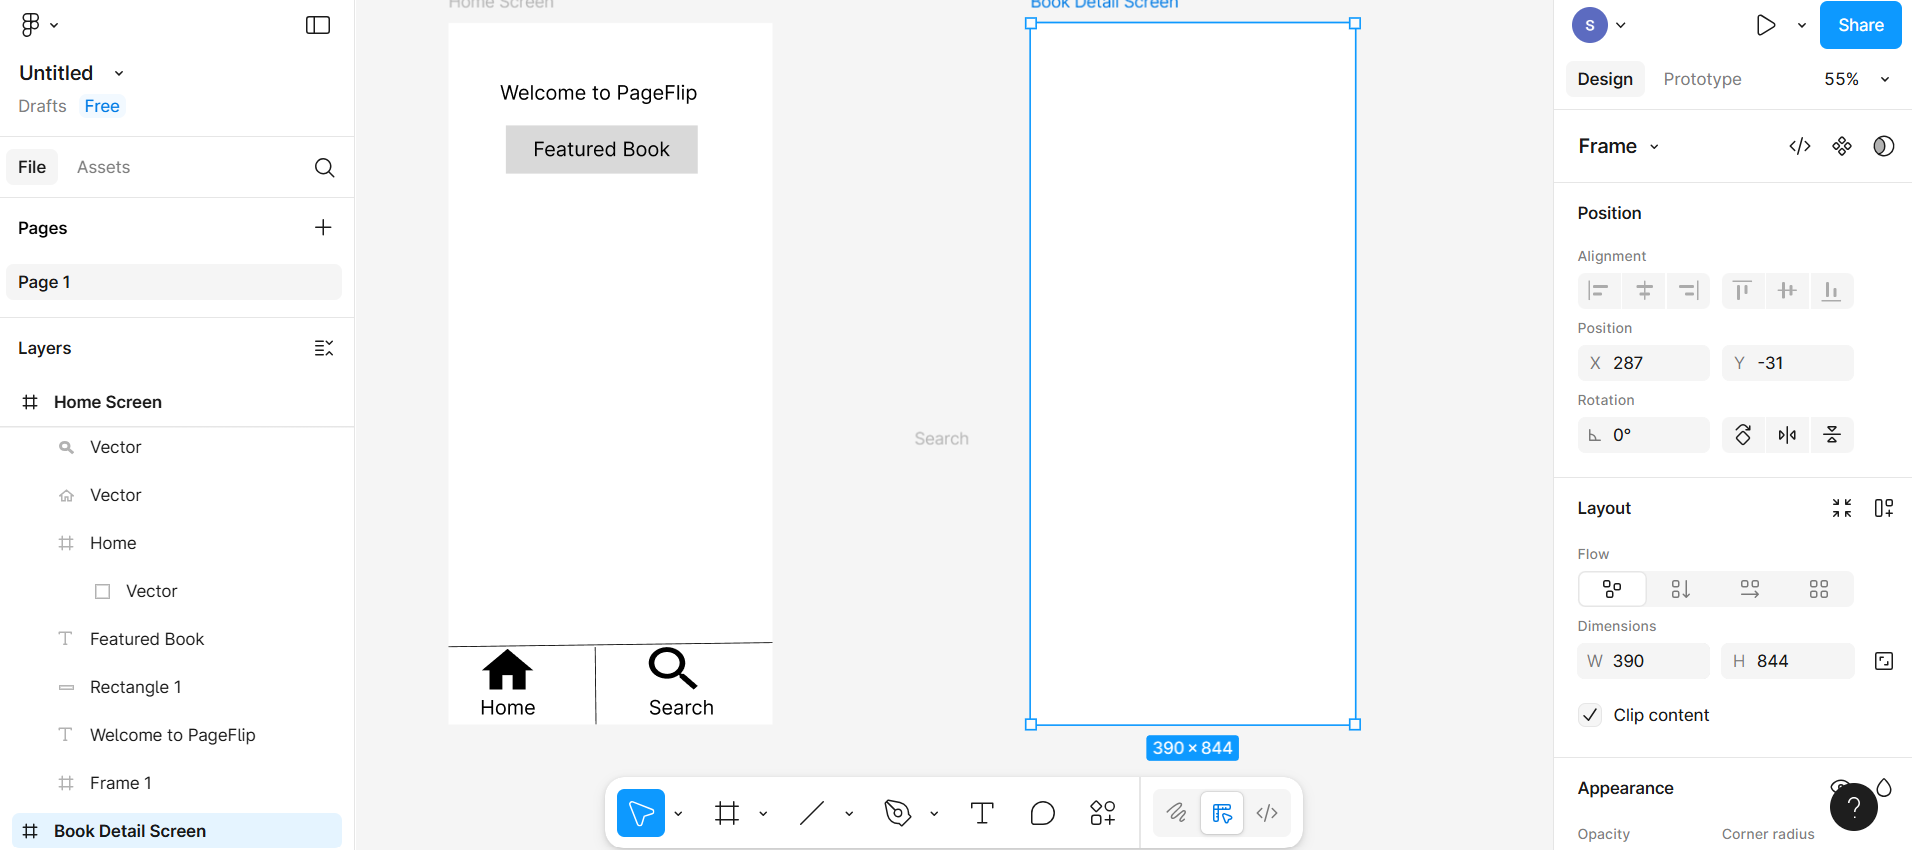
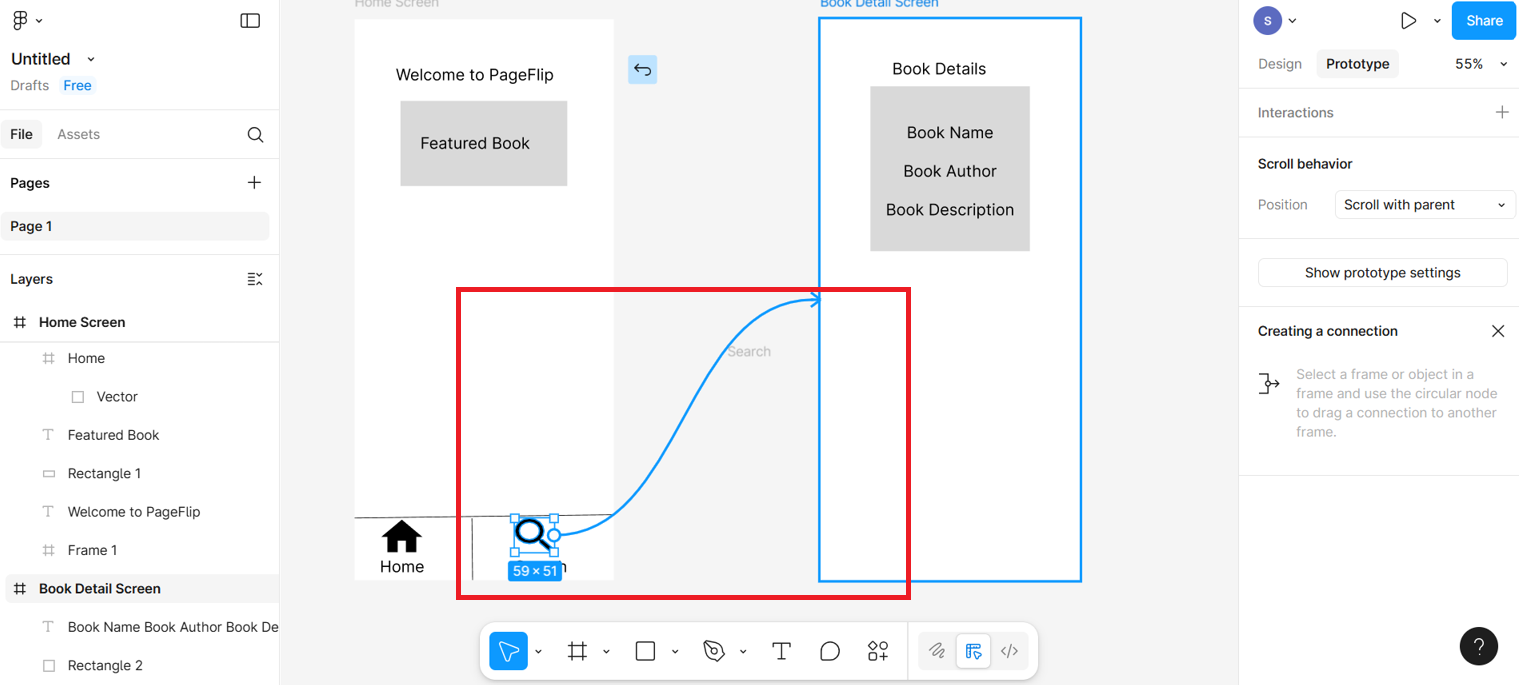
Select the "Search" icon on the Home screen. Drag the blue circle to the "Book Detail" screen
After dragging it will look according to given screenshot.
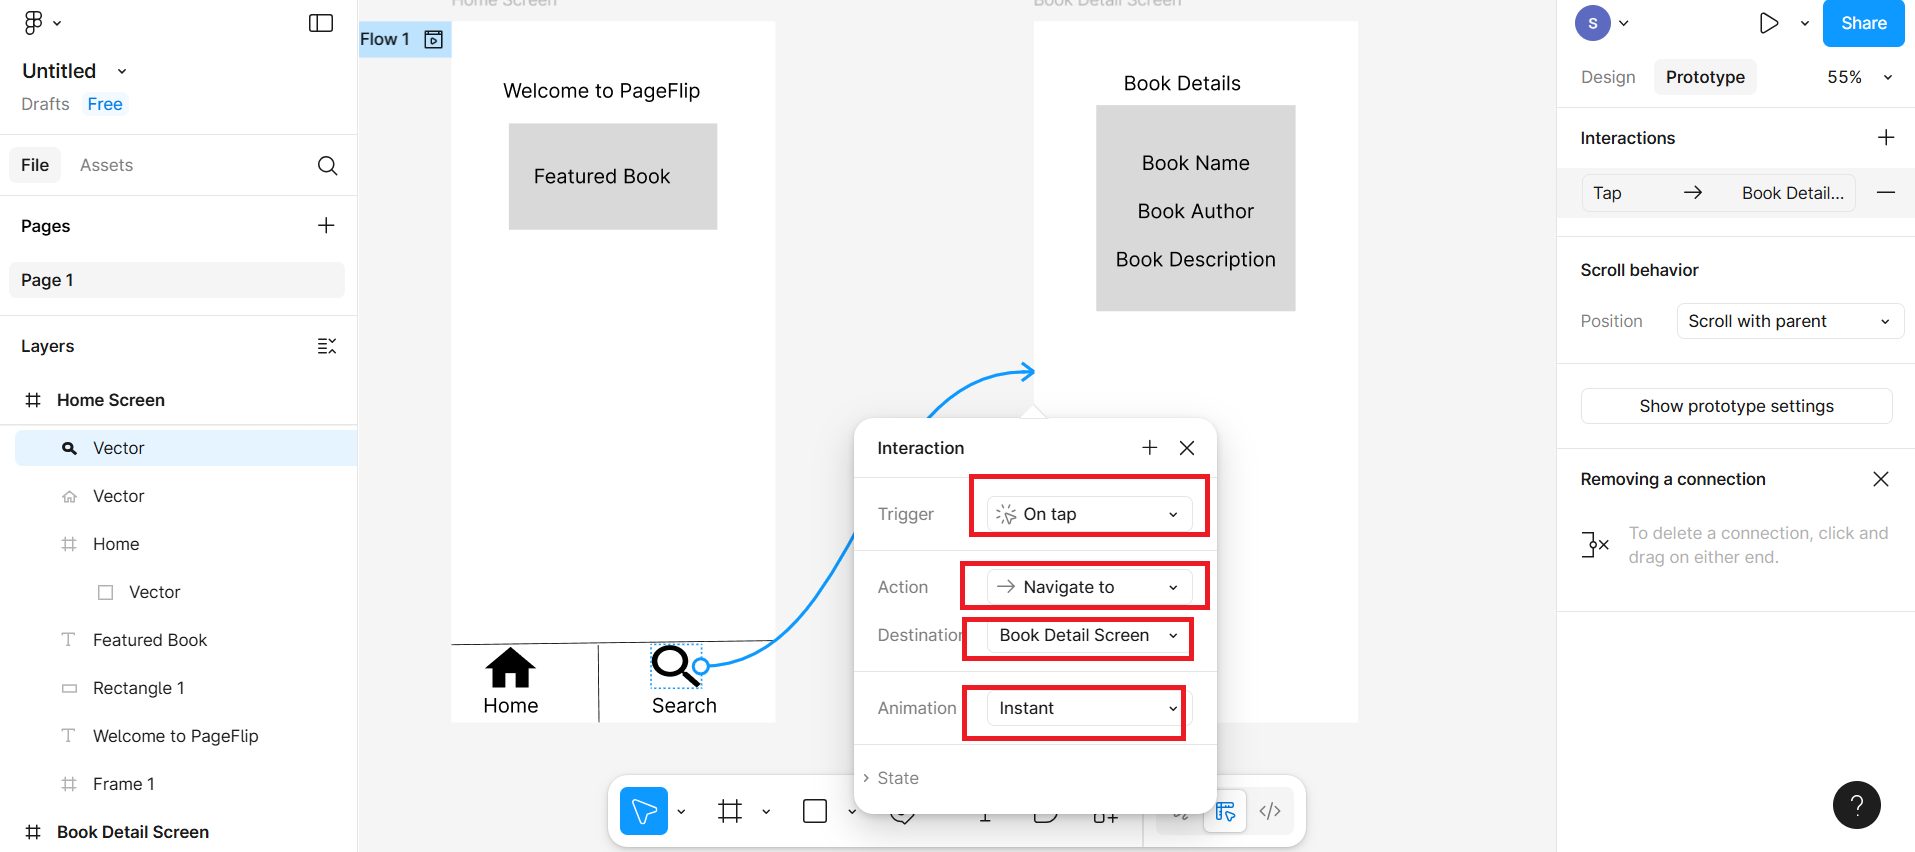
In interaction settings:
Trigger: On Tap
Action: Navigate To → Book Detail Screen
Animation: Instant
Step 5: Add swipe gesture in book detail screen
Now add a left-arrow icon to indicate swipe navigation.
Select the icon and drag the blue circle of the icon towards the "Home Screen"
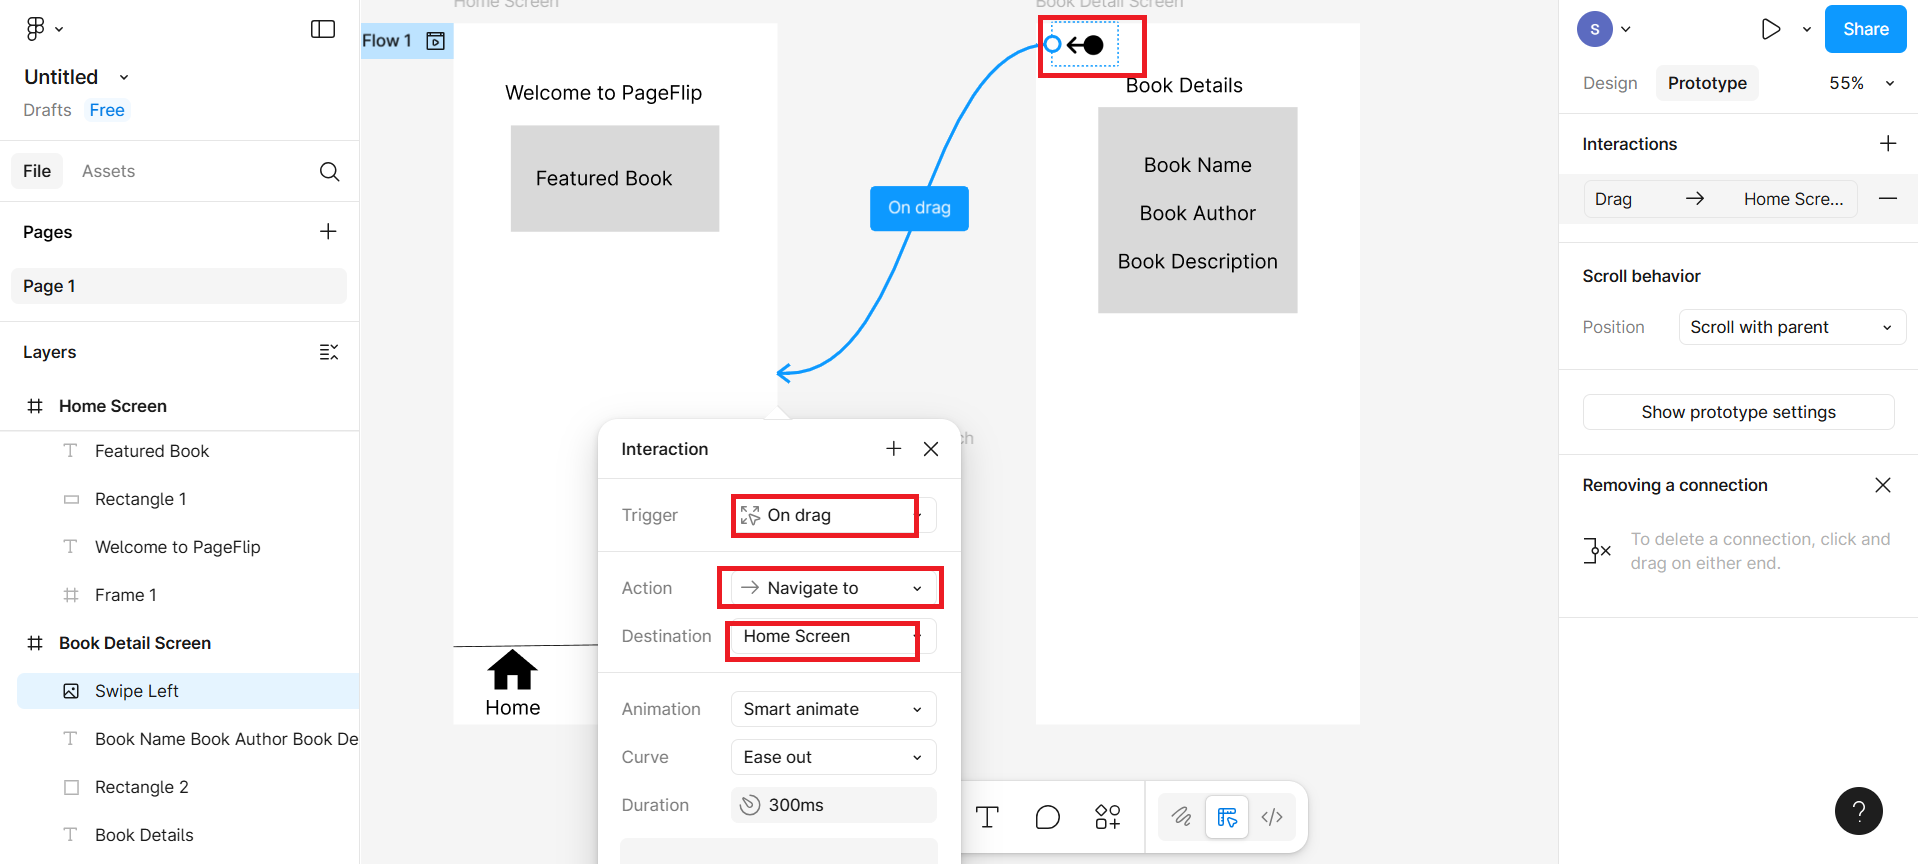
In interaction settings:
- Trigger: On Drag
- Action: Navigate To → Home Screen
- Animation: Smart Animate
Step 6: Test the prototype
Click the Present button on top-right
The view will according to given screenshot
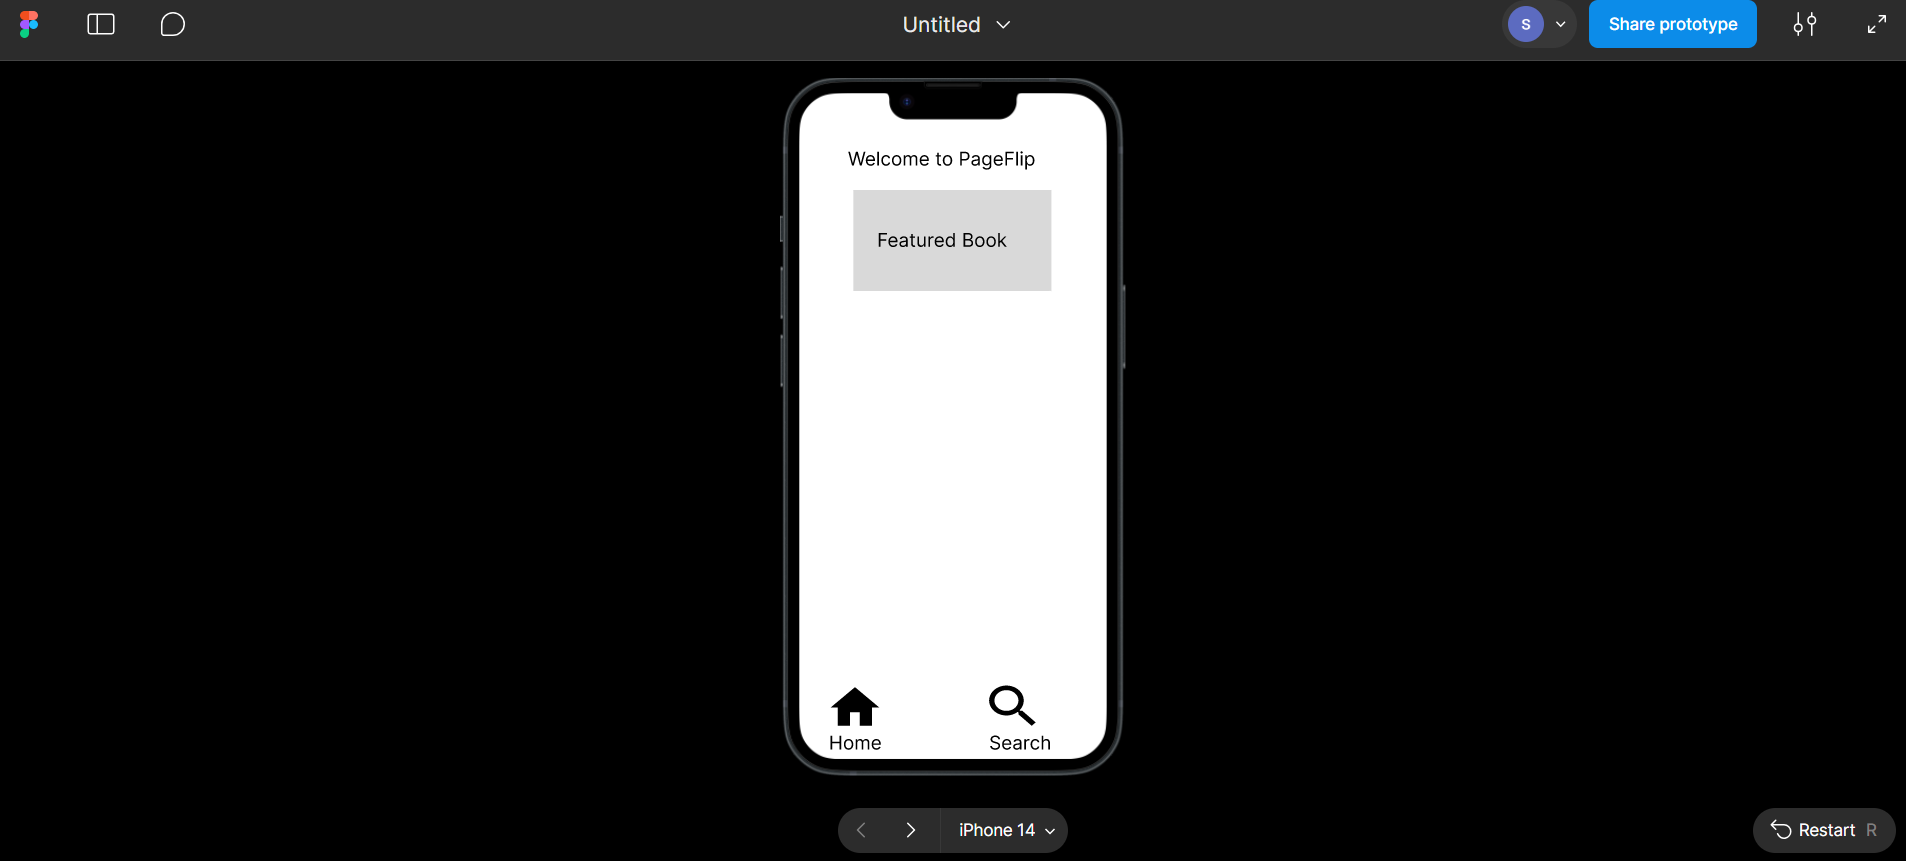
Now try tapping the "Search" icon. It will take you to the Book Detail screen
Now in Book Detail screen try dragging the screen left to simulate a swipe

Summary
In this lab, you created a simple navigation bar and a swipe gesture between two screens using Figma. This hands-on task helps you understand how to connect screens with basic interactions to make your mobile designs feel more real and user-friendly.
Practice Task: Extend your PageFlip app prototype
Add one more icon such as Favorites or Profile to the bottom bar on the Home Screen using the Material Icons plugin.
Label the new icon accordingly such as "Favorites".
Create a third screen called Favorites Screen or Profile Screen.
Design this new screen with a simple layout: title at the top, placeholder text or image in the center.
Use the Prototype tab to link the new icon from the Home Screen to this new screen.
Interactions:
- Set Trigger: On Tap
- Action: Navigate To → Favorites/Profile Screen
- Animation: Instant or Smart Animate
Test your prototype again to make sure all three screens are navigable using the icons
Author(s)
Richa Arora